Advanced Techniques in Porcelain Sign Restoration
Restoring vintage gas station signs is a rewarding, albeit challenging, hobby. While basic cleaning and surface repairs are common, severely damaged signs often require advanced techniques to bring them back to a presentable condition. This article delves into some of those advanced methods, focusing on chip repair and crack filling, essential skills for anyone serious about preserving these pieces of automotive history. We'll assume a foundational understanding of basic restoration, including cleaning and rust removal, before tackling these more complex procedures. Incorrect application of these techniques can diminish a sign’s value, so proceed with caution and research each step thoroughly.
Understanding Porcelain Sign Damage
Before attempting any advanced repair, it’s crucial to understand the nature of porcelain. Porcelain enamel signs are created by fusing a layer of enamel to a steel base. This process creates a durable surface, but impact, age, and environmental factors can inflict significant damage. Chips and cracks aren't merely cosmetic; they compromise the structural integrity of the sign and can lead to further deterioration. Identifying the type of damage – the size of the chip, the severity of the crack, the underlying rust, and the surrounding paint – is vital for selecting the appropriate repair method.
Common Types of Damage Encountered:
- Chips: These can range from small nicks to large chunks missing, exposing the underlying steel.
- Cracks: Hairline cracks are less problematic than deep, radiating cracks that weaken the enamel.
- Rusting: Chips and cracks expose the steel beneath, leading to rust. Addressing this is a priority.
- Loss of Graphics: Significant damage can erase the original printed graphics, making restoration more complex.
Chip Repair: A Layered Approach
Chip repair is arguably the most visible and challenging aspect of porcelain sign restoration. The goal isn’t to perfectly replicate the original enamel (impossible without specialized equipment and skills), but to create a repair that is visually acceptable and minimizes further damage.
Materials Needed:
- Porcelain Repair Epoxy: Specifically formulated for porcelain restoration.
- Color-Matched Epoxy Fillers: Multiple colors to blend with the sign's original enamel.
- Razor Blades or Scrapers: For precise application and removal of excess epoxy.
- Fine-Grit Sandpaper: Various grits (400, 600, 1000+) for smoothing the repair.
- Color-Matched Enamel Paint: For final color blending.
- Clear Coat (Optional): For added protection and gloss.
The Process:
- Preparation: Thoroughly clean the chipped area. Remove any loose enamel or rust. A wire brush can be helpful for removing surface rust.
- Rust Prevention: Apply a rust-inhibiting primer to the exposed steel. This is crucial to prevent further corrosion.
- Base Coat: Apply a thin layer of porcelain repair epoxy to the chip. This creates a foundation for subsequent layers.
- Layered Fillings: Using color-matched epoxy fillers, build up the chip in thin, incremental layers. Allow each layer to cure completely before applying the next. This layering technique minimizes shrinkage and reduces the likelihood of cracking. Carefully blend the edges of the repair to make it less noticeable.
- Sanding and Smoothing: Once the epoxy is fully cured, use progressively finer grits of sandpaper to smooth the repair. Be extremely cautious not to sand away the surrounding original enamel. The goal is to create a level surface that closely matches the surrounding texture.
- Color Matching: Mix and apply color-matched enamel paint to precisely match the original sign's color. Multiple thin coats are preferable to a single thick coat.
- Clear Coat (Optional): Apply a clear coat to protect the repair and restore a glossy finish.
Image: 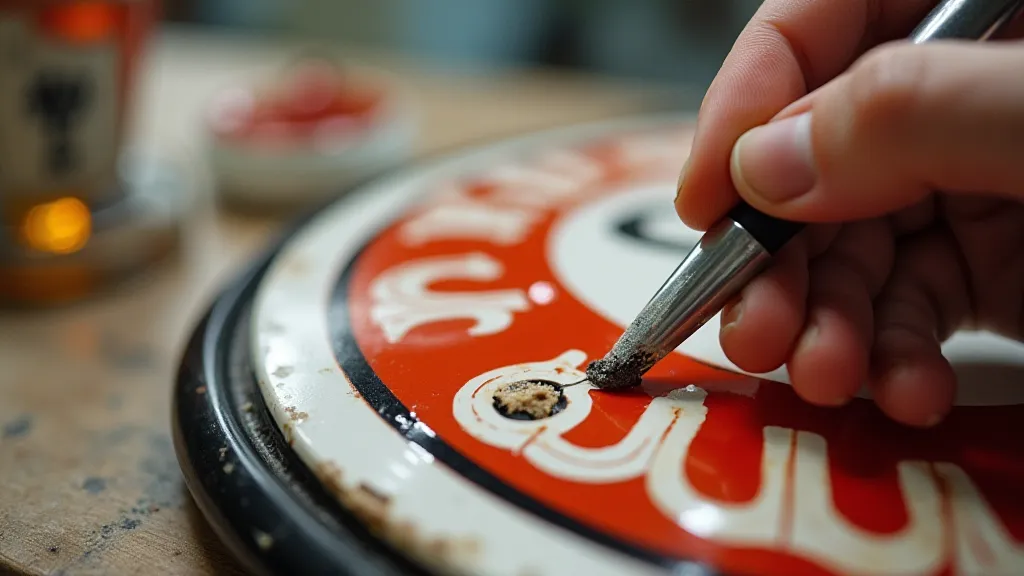
Crack Filling: Stabilizing and Camouflaging
Cracks in porcelain signs pose a different challenge. While complete eradication is usually impossible, stabilizing the crack and minimizing its visibility is the objective. Crack filling focuses on preventing the crack from spreading and reducing its appearance.
Materials Needed:
- Porcelain Repair Epoxy: Again, crucial for a strong bond.
- Flexible Epoxy Fillers: These accommodate slight movement and prevent the repair from cracking.
- Color-Matched Enamel Paint: For blending the repair into the original enamel.
- Fine-Grit Sandpaper: For smoothing the filler.
The Process:
- Cleaning: Carefully clean the crack, removing any dirt or debris. A gentle solvent may be helpful.
- Stabilization: Apply a thin layer of porcelain repair epoxy along the entire length of the crack. This helps to stabilize the enamel and prevent further spreading.
- Filling: Use flexible epoxy fillers to fill the crack. Apply in thin layers, allowing each layer to cure completely. Avoid overfilling, as this will create an uneven surface.
- Sanding and Smoothing: Carefully sand the filled crack to create a level surface. Again, be incredibly cautious about sanding away original enamel.
- Color Matching: Blend the filled crack with the surrounding enamel using color-matched paint. Multiple thin coats are essential.
Image: 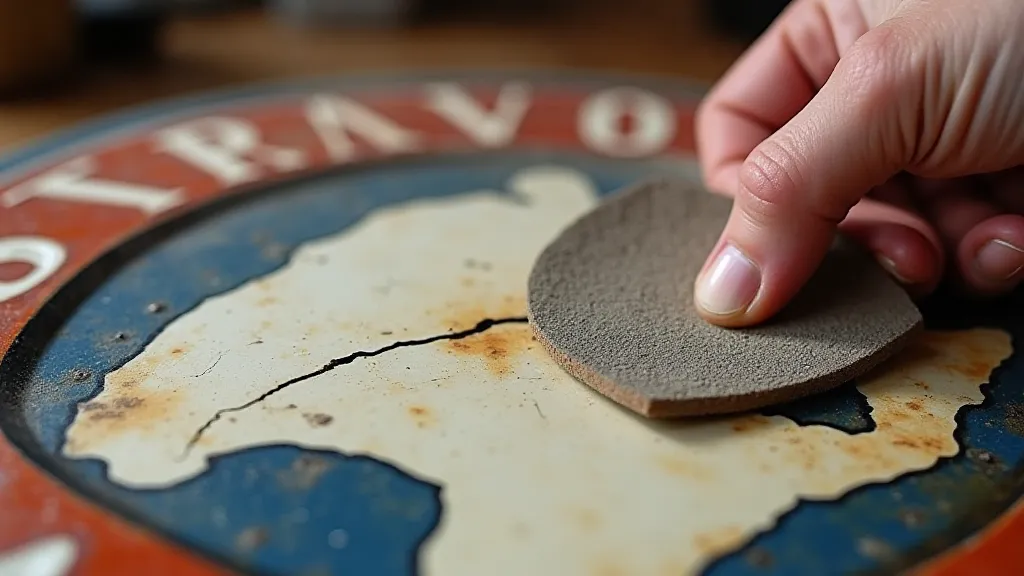
Important Considerations & Caveats
- Practice Makes Perfect: These techniques require practice. Start with less valuable signs to hone your skills.
- Damage Severity: Severely damaged signs may be beyond reasonable restoration. Know when to stop.
- Value Impact: Repairs *always* impact the value of a vintage sign, though a well-executed repair can minimize the loss.
- Document Everything: Keep meticulous records of the repairs made. This is important for transparency and potential future appraisal.
- Rust Prevention is Key: Addressing rust is paramount to the longevity of the repair.
- Professional Advice: For particularly valuable or historically significant signs, consider consulting a professional restoration expert.
Image: